Upgrading your computer’s CPU can greatly improve its performance, but before you make a purchase, it’s important to ensure that the new CPU is compatible with your motherboard. One crucial factor to consider is the motherboard socket type, which determines the physical and electrical interface between the CPU and the motherboard.
Let’s dive into the topic by sharing a relatable story. Meet Sarah, an avid gamer who wanted to upgrade her computer’s CPU to enhance her gaming experience. She had recently learned about the importance of the motherboard socket type and wanted to make sure she chose the right CPU for her system.
Sarah decided to do some research and make an informed decision. She carefully inspected her motherboard, hoping to find some clues about the socket type. However, she couldn’t find any visible indications. Feeling a bit lost, she turned to the internet for guidance.
After a quick search, Sarah came across an article that explained how to identify the motherboard’s socket type. She learned that she could use software tools like CPU-Z or Speccy to find the information she needed. She eagerly downloaded CPU-Z and ran it on her computer.
To her delight, CPU-Z displayed detailed information about her system, including the motherboard model and the socket type. Sarah discovered that her motherboard had an LGA 1151 socket, which was vital information for choosing a compatible CPU.
Armed with this newfound knowledge, Sarah started her search for compatible CPUs with an LGA 1151 socket. She compared different options based on their specifications, performance, power consumption, and cooling requirements. After careful consideration, she found the perfect CPU for her needs.
With excitement, Sarah proceeded to purchase the CPU and followed the manufacturer’s instructions to install it properly. Thanks to her research and understanding of motherboard socket types, Sarah successfully upgraded her computer without compatibility issues.
As you embark on your own CPU upgrade journey, it’s crucial to identify your motherboard’s socket type. By following the steps outlined in this article, you can confidently determine your motherboard’s socket type, find a suitable CPU, and avoid any potential compatibility problems.
Key Takeaways:
- Identifying your motherboard’s socket type is crucial when upgrading your CPU.
- Software tools like CPU-Z or Speccy can help you find the socket type.
- Once you know the socket type, you can find compatible CPUs and make an informed decision.
- Consider factors such as performance, power consumption, and cooling requirements when comparing CPU options.
- Follow the manufacturer’s instructions to install the new CPU properly.
Why is the Motherboard Socket Type Important?
The motherboard socket type plays a crucial role in determining CPU compatibility and ensuring a successful CPU upgrade. It serves as the physical and electrical interface between the CPU and the motherboard, allowing them to communicate and work together seamlessly. Different socket types are not interchangeable, meaning that a CPU designed for one socket type will not fit or function properly in a motherboard with a different socket type.
Choosing a compatible CPU is essential because it directly affects the performance and functionality of your system. If the CPU and motherboard have mismatched socket types, the CPU simply cannot be installed or operate on the motherboard.
Upgrading your CPU requires careful consideration of the motherboard’s socket type to ensure compatibility. Installing an incompatible CPU can lead to system instability, performance issues, and even irreversible damage to your components.
Therefore, before upgrading your CPU, it is crucial to determine the socket type of your motherboard and then choose a CPU that is specifically designed for that socket type. This ensures that your new CPU will fit correctly into the motherboard’s socket and operate optimally, allowing you to enjoy improved performance and functionality.
Remember, the motherboard socket type is the key to CPU compatibility and a successful upgrade. Take the time to determine your motherboard’s socket type and choose a compatible CPU for a seamless and efficient system.
How to Identify Your Motherboard’s Model
Identifying your motherboard model is crucial when it comes to determining hardware support and compatibility. Having this information allows you to make informed decisions about CPU upgrades, memory compatibility, and other hardware-related upgrades. There are several methods you can use to identify your motherboard’s model. Here are some reliable options:
- Check the physical board: Open your computer case and visually inspect the motherboard. Look for any labels, stickers, or engraved markings that indicate the model number. Common locations include the surface of the board itself or around the CPU socket.
- Look for a sticker: Some motherboards have a sticker on the back or side that displays the model number, along with other relevant information. Take note of this number as it will help you in the next steps.
- Use software tools: There are software tools available that can provide detailed information about your motherboard model. Two popular options are CPU-Z and Speccy, both of which can be downloaded for free. Simply install the software, run it, and navigate to the “Motherboard” or “Mainboard” section to find the model number.
- Refer to the documentation: If you still have the documentation that came with your computer or motherboard, check it for the model number. The documentation may include a manual, warranty information, or a product sheet. Look for any section that mentions the motherboard model or specifications.
- Visit the manufacturer’s website: For accurate and up-to-date information, visit the official website of the motherboard manufacturer. Navigate to the support or downloads section, and search for your motherboard model using the provided search function or by selecting the appropriate product category. The manufacturer’s website will provide detailed specifications, drivers, and other relevant information about your motherboard model.
By following these steps, you can easily identify your motherboard’s model and access the necessary information for hardware support and compatibility.
In the next section, we will show you how to look up the socket type for your motherboard, which is essential for determining CPU compatibility.
How to Look Up the Socket Type
Once you have identified your motherboard model, you may need to determine the specific socket type it supports. The socket type of your motherboard is crucial for finding a compatible CPU. To simplify the process, you can utilize online resources such as CPU-World or PCPartPicker, or perform a simple online search.
These platforms provide comprehensive information about various socket types available in the market, including popular ones like LGA 1151, AM4, or TR4. By utilizing these resources, you can quickly identify the socket type of your motherboard and proceed with your CPU upgrade plans.
Here is an example search query you can use with any search engine:
How to find the socket type of my [insert your motherboard model] motherboard
By using CPU-World, PCPartPicker, or conducting an online search, you can locate the necessary information about your motherboard’s socket type with ease.
It’s important to note that the socket type determines the physical and electrical interface between the CPU and the motherboard. Therefore, it’s crucial to ensure that the CPU you intend to purchase is compatible with your motherboard’s socket type for optimal performance and functionality.
Search Results Example: CPU-World
CPU-World offers a vast database of information related to CPU specifications, including socket types and their respective compatible CPUs. Here’s a step-by-step guide:
- Visit the CPU-World website (www.cpu-world.com).
- Search for your motherboard model using the website’s search function.
- On the motherboard’s specifications page, you will find detailed information regarding the socket type and compatible CPUs.
This detailed information provides a deeper understanding of the compatibility options available for your motherboard, allowing you to make an informed decision when choosing a CPU.
Comparing Compatible CPU Options
Once you have determined the socket type of your motherboard, it’s time to compare the compatible CPU options. This step is crucial in choosing the right CPU that meets your needs and works seamlessly with your motherboard.
When comparing CPU options, consider the following factors:
- CPU Specifications: Review the specifications of each CPU, such as the number of cores, clock speed, cache size, and supported technologies. These specifications determine the performance capabilities of the CPU and its compatibility with specific tasks or software requirements.
- Performance: Look for benchmarks and performance reviews to assess how well each CPU performs in real-world scenarios. Compare the performance metrics across different CPUs to determine which one suits your requirements.
- Power Consumption: Consider the power consumption of each CPU as it affects both the performance and your electricity bill. CPUs with lower power consumption are more energy-efficient and can help reduce operating costs in the long run.
- Cooling Requirements: Different CPUs have varying cooling requirements. Some CPUs come with their own cooling solutions, while others require aftermarket coolers. Assess the cooling options available for each CPU to ensure efficient heat dissipation and optimal performance.
- Budget: Determine your budget for the CPU purchase. Compare the prices of different CPUs and weigh them against their performance and features. Strike a balance between cost and performance to get the best value for your money.
By carefully considering these factors, you can make an informed decision about which CPU best fits your needs and works harmoniously with your motherboard.
“Comparing the specifications, performance, power consumption, cooling requirements, and budget of different compatible CPU options will help you choose the ideal CPU for your motherboard. Take the time to analyze and compare these factors to make a confident decision.”
To assist you in visualizing the differences between compatible CPU options, here is a comparison table:
| CPU Model | Specifications | Performance | Power Consumption | Cooling Requirements | Price |
|---|---|---|---|---|---|
| Intel Core i7-10700K | 10 Cores, 16 Threads Base Clock: 3.8GHz Max Boost Clock: 5.1GHz Cache: 16MB Socket: LGA 1200 | Excellent for gaming and productivity tasks | 125W | Requires aftermarket cooler for optimal performance | $399 |
| AMD Ryzen 7 5800X | 8 Cores, 16 Threads Base Clock: 3.8GHz Max Boost Clock: 4.7GHz Cache: 36MB Socket: AM4 | Exceptional performance for gaming and content creation | 105W | Includes Wraith Prism cooler | $449 |
| Intel Core i5-11600K | 6 Cores, 12 Threads Base Clock: 3.9GHz Max Boost Clock: 4.9GHz Cache: 12MB Socket: LGA 1200 | Great for mid-range gaming and multitasking | 125W | Requires aftermarket cooler for optimal performance | $269 |
Keep in mind that this table is just an example and not an exhaustive list of CPU options. It showcases the key specifications, performance, power consumption, cooling requirements, and prices of different CPUs to help you understand the differences and make an informed decision.
Checking the BIOS Version
Before purchasing a new CPU, it is crucial to check the BIOS version of your motherboard. The BIOS (Basic Input/Output System) is the firmware that controls the essential functions of your motherboard and enables communication with the CPU. In some cases, newer CPUs may require a BIOS update for compatibility.
You can check the BIOS version through the BIOS setup menu during the boot process or by using software tools like CPU-Z or Speccy. These tools provide detailed information about your system, including the BIOS version.
Another reliable source for the latest BIOS version and compatibility information is the manufacturer’s website for your specific motherboard model. Refer to the website to find the most up-to-date BIOS version and any relevant compatibility details.
It is important to ensure that your motherboard’s BIOS version is compatible with the CPU you intend to purchase. Incompatible BIOS versions may prevent the CPU from functioning properly or even prevent it from being recognized by the motherboard.
Always check the BIOS version and ensure compatibility with your desired CPU before making a purchase. This step is essential to avoid any potential compatibility issues and ensure smooth CPU installation and operation.
Recommended Steps to Check the BIOS Version:
- Restart your computer and access the BIOS setup menu by pressing the designated key during the boot process. The key to access the BIOS setup menu varies depending on the motherboard manufacturer (e.g., F2, Del, Esc).
- Navigate to the BIOS information section or similar, where you can find the BIOS version and date. Note down the version information for future reference.
- If the BIOS version displayed is not the latest, visit the motherboard manufacturer’s website and search for the BIOS updates for your specific model. Download and follow the instructions provided to update the BIOS to the latest version. Ensure that the update is compatible with your CPU.
- After updating the BIOS, restart your computer and enter the BIOS setup menu again to verify the updated BIOS version.
By following these steps, you can determine the BIOS version of your motherboard, ensure compatibility with your desired CPU, and update the BIOS if necessary. This process will help optimize the performance and functionality of your CPU and ensure a seamless computing experience.
Buying and Installing the CPU
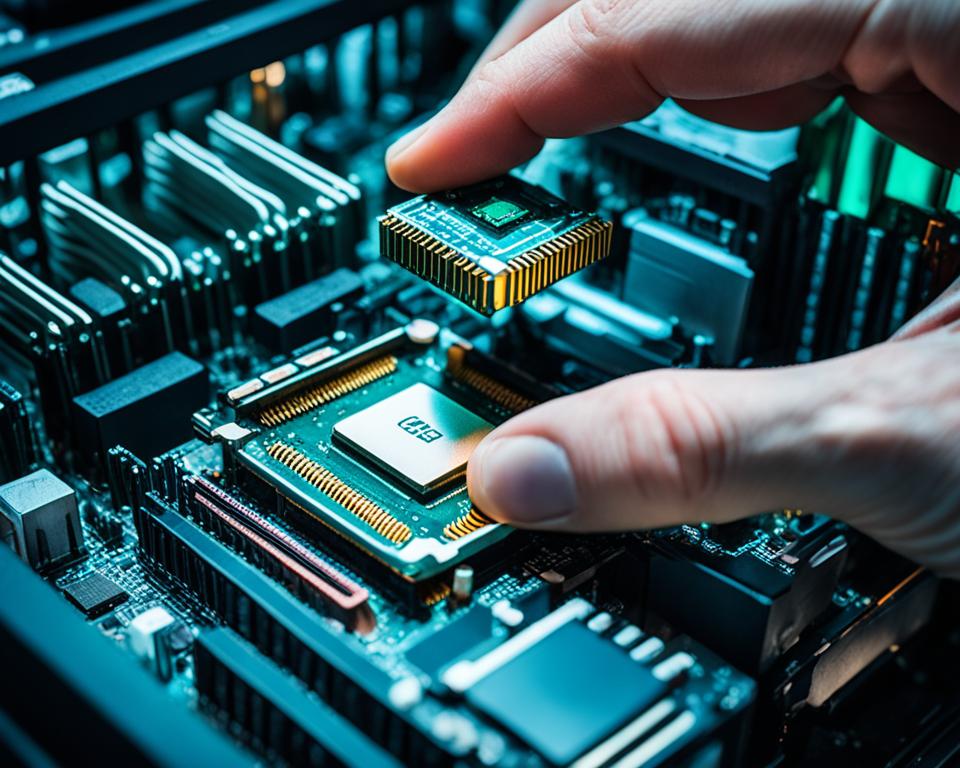
Once you have chosen a CPU that is compatible with your motherboard’s socket type and BIOS version, you are ready to proceed with the purchase and installation process. Before you begin, make sure you have the necessary tools and materials:
- Screwdriver
- Thermal paste
- Anti-static wrist strap
These tools and materials are essential for a smooth and successful CPU installation. The screwdriver will help you remove the old CPU and secure the new one in place. Thermal paste is necessary to ensure proper heat transfer between the CPU and the cooler. And the anti-static wrist strap will protect your components from any static electricity damage during the installation process.
Follow these steps to properly install the CPU:
- Begin by shutting down your computer and disconnecting all cables.
- Open your computer case and locate the CPU socket on the motherboard.
- Use the screwdriver to remove the cooler and any retention mechanism holding the old CPU in place.
- Gently lift the old CPU out of the socket and set it aside.
- Carefully clean the CPU socket and remove any excess thermal paste from the cooler.
- Apply a small amount of thermal paste onto the center of the new CPU. Be sure not to apply too much as it can cause issues.
- Align the notches or markings on the new CPU with those on the CPU socket and carefully lower it into place.
- Once the CPU is seated correctly, secure it in place using the retention mechanism or screws.
- Reattach the cooler, making sure it is properly aligned and securely fastened.
- Reconnect all cables and close your computer case.
It is important to follow the instructions and precautions provided by the CPU and motherboard manufacturers. Each model may have specific installation guidelines that you should be aware of to prevent any damage to your components.
Example CPU Installation
Let’s take a look at an example CPU installation using an Intel Core i7-9700K processor:
| Tools and Materials | Brand/Model |
|---|---|
| Screwdriver | Phillips #2 |
| Thermal Paste | Arctic MX-4 |
| Anti-static Wrist Strap | Generic |
By following the proper installation steps and using the necessary tools and materials, you can successfully install a CPU that is compatible with your motherboard. Take your time, be careful, and refer to the manufacturer’s instructions to ensure a smooth and trouble-free installation process.
Considering Future Compatibility
When choosing a CPU and motherboard, it is essential to consider future compatibility to avoid any compatibility issues down the line. Stay updated with the latest developments and trends in the PC market, as new generations of CPUs and motherboards may introduce new socket types or require BIOS updates. To ensure compatibility with future generations of processors, make use of a CPU socket compatibility chart.
Plan your upgrade accordingly, considering both your current needs and potential future requirements. Assess the lifespan of the chosen socket type and evaluate if it aligns with your long-term upgrade plans.
By taking future compatibility into account, you can future-proof your system and avoid the hassle of having to upgrade multiple components simultaneously.
Advantages of Considering Future Compatibility:
- Ensures compatibility with upcoming CPU generations
- Minimizes the need for frequent upgrades
- Saves time and money by avoiding compatibility issues
- Facilitates smooth and hassle-free system maintenance and expansion
Stay informed and plan ahead to make the most out of your CPU and motherboard combination.
Tips for Upgrading without Compatibility Issues
When planning to upgrade your CPU or motherboard, it is crucial to consider compatibility to ensure a smooth and successful upgrade process. Here are some tips to help you upgrade without any compatibility issues:
1. Refer to the CPU socket compatibility chart: Before purchasing a new CPU or motherboard, always consult the CPU socket compatibility chart. This chart provides detailed information about which CPU socket types are compatible with specific motherboard models. Make sure that the CPU socket type matches the motherboard socket type to avoid any compatibility issues.
2. Keep track of other component compatibility: In addition to CPU and motherboard compatibility, it’s essential to consider the compatibility of other components such as memory, storage, and graphics cards. Ensure that these components are compatible with the new CPU and motherboard to guarantee optimal performance.
3. Plan for future upgrades: Consider your upgrade plans and the compatibility of the chosen CPU and motherboard with future generations. Stay informed about the latest developments and trends in the PC market to avoid any surprises down the line. By choosing components with future compatibility in mind, you can extend the lifespan of your system and save yourself from potential compatibility issues in the future.
By following these tips, you can make an informed decision, avoid compatibility issues, and ensure a smooth upgrade process. Take the time to research, consult compatibility charts, and consider future upgrades to create a system that meets your needs and is compatible with the latest technologies.

