Have you ever wanted to connect your computer to a larger display, but couldn’t find the right ports? That’s exactly what happened to me last week. I had just finished editing a video project on my computer and wanted to show it to my family on our living room TV. Unfortunately, my computer didn’t have an HDMI port, and I was left scratching my head, wondering how to make it work.
After some research and trial and error, I discovered the solution: enabling the HDMI port on my motherboard. It was like unlocking a hidden treasure chest of connectivity options. With just a few simple steps, I was able to connect my computer to the TV and enjoy the perfect movie night with my family.
If you’re facing a similar situation or want to harness the power of the HDMI port on your motherboard, this article is for you. I’ll guide you through the process of enabling the HDMI port, troubleshooting common issues, and providing connectivity solutions for a seamless video output experience. Let’s dive in!
Key Takeaways:
- Enabling the HDMI port on your motherboard opens up a world of connectivity options for your computer.
- Follow the step-by-step process to enable the HDMI port on your motherboard and troubleshoot any issues that may arise.
- Understanding the differences between motherboard HDMI and GPU HDMI will help you make informed decisions about your graphics setup.
- Connect and use motherboard HDMI or GPU HDMI depending on your specific needs and preferences.
- Consider the advantages and drawbacks of using motherboard HDMI to determine if it’s the right choice for you.
Understanding the Differences between Motherboard HDMI and GPU HDMI
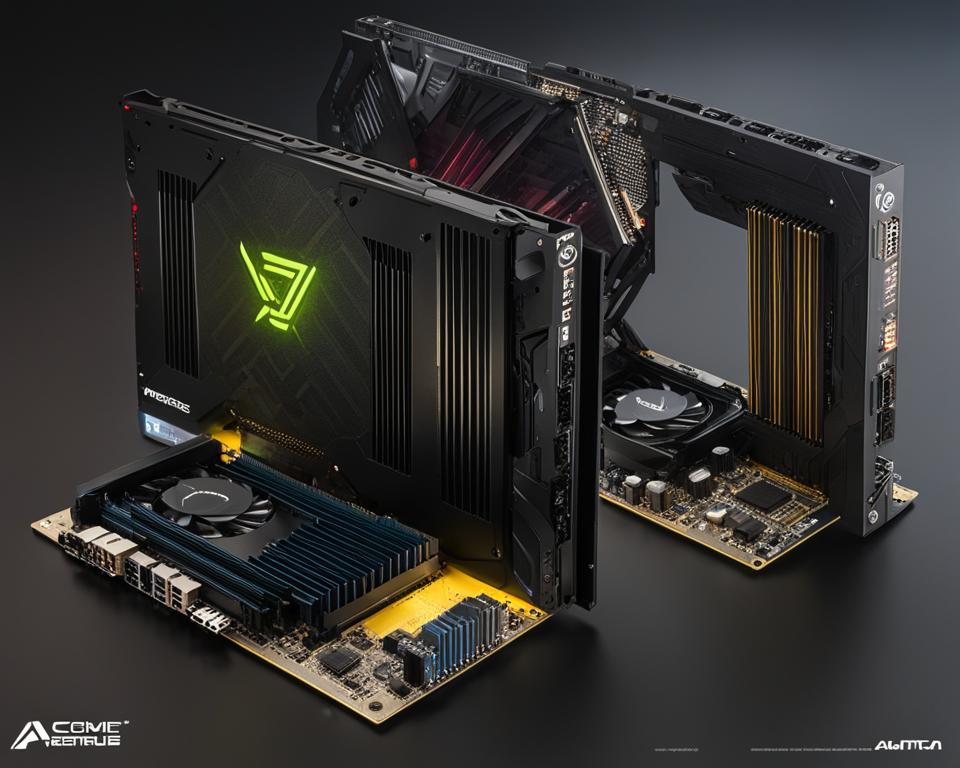
When it comes to connecting your computer to external displays, you have two options: motherboard HDMI and GPU HDMI. Understanding the differences between these two types of HDMI ports is essential to make the right choice for your specific needs.
Motherboard HDMI:
Motherboard HDMI refers to the HDMI port integrated directly into the computer’s motherboard. This HDMI port utilizes the onboard graphics processing unit (GPU) to display graphics on connected monitors or TVs. Integrated graphics, powered by the CPU, handle the visual processing tasks, making it a convenient and cost-effective solution for users who don’t require advanced graphics capabilities.
GPU HDMI:
On the other hand, GPU HDMI refers to the HDMI port found on a dedicated graphics card. A dedicated graphics card, also known as a discrete graphics card, comes with its own GPU, separate from the CPU. This setup offers more advanced graphics capabilities and is commonly used by gamers, graphic designers, and other users who need high-performance graphics for their work or entertainment.
While both motherboard HDMI and GPU HDMI serve the purpose of connecting your computer to external displays, the primary difference lies in the graphics processing power. Motherboard HDMI relies on integrated graphics, which are suitable for everyday tasks, multimedia playback, and even some light gaming. GPU HDMI, on the other hand, provides enhanced graphics performance and is capable of handling resource-intensive applications, demanding games, and graphics-intensive tasks more effectively.
It’s important to consider your specific needs and usage requirements when deciding between motherboard HDMI and GPU HDMI. If you primarily use your computer for basic tasks and don’t require advanced graphics capabilities, motherboard HDMI can be a suitable choice. However, if you’re a gamer, graphic designer, or work with visually demanding applications, a dedicated graphics card with GPU HDMI will provide you with the necessary power and performance.
Keep in mind that using a dedicated graphics card with GPU HDMI may require additional power and cooling considerations, as these cards tend to consume more energy and generate more heat. Additionally, they may come at a higher price point compared to motherboards with integrated graphics.
In the upcoming sections, we will explore how to connect and use both motherboard HDMI and GPU HDMI, as well as discuss the advantages and drawbacks of each option. By the end of this article, you’ll have a comprehensive understanding of HDMI connectivity options, helping you make an informed decision based on your specific requirements.
How to Connect and Use Motherboard HDMI
To fully utilize the capabilities of your motherboard’s HDMI port, you need to follow a series of simple steps. By connecting your computer to a compatible display device using an HDMI cable, you can enjoy high-quality video output and an enhanced viewing experience.
Before you begin the setup process, make sure you have the necessary equipment. You’ll need a compatible monitor or display with an HDMI input and a high-quality HDMI cable. These components ensure a reliable and seamless connection between your computer and the display device.
Follow this step-by-step guide to connect and use the motherboard HDMI:
- Power down your computer completely.
- Locate the HDMI port on the back panel of your computer tower. It is typically labeled and is distinguishable by its rectangular shape.
- Take one end of the HDMI cable and securely connect it to the HDMI port on your computer. Ensure that the cable fits snugly and is tightly fastened.
- Connect the other end of the HDMI cable to the HDMI input on your monitor or display.
- Power on your computer and then turn on your display device.
- Once both devices are powered on, you may need to configure the display settings on your computer. This can be done through the operating system’s display settings or graphics control panel settings.
- Make sure to select the appropriate display mode (e.g., extending the display, duplicating the display) and adjust the resolution settings if necessary.
Following these steps will enable you to successfully connect and use the motherboard HDMI. You can now enjoy crystal-clear video output and utilize the full potential of your computer’s graphics capabilities.
When connecting and using the motherboard HDMI, it’s important to ensure that both the hardware and software components are properly configured. This guarantees optimal performance and eliminates any potential issues that may arise during the setup process.
How to Connect and Use GPU HDMI
Connecting and using GPU HDMI is a straightforward process that requires a dedicated graphics card and a compatible monitor or display with an HDMI input. While the setup is similar to connecting and using motherboard HDMI, utilizing the GPU HDMI port offers enhanced graphics performance. Follow this step-by-step guide to set up and make the most of your GPU HDMI connection.
- Ensure you have a dedicated graphics card installed in your computer.
- Identify a compatible monitor or display with an HDMI input.
- Power off your computer and the display device.
- Locate the HDMI port on your graphics card. It is usually located on the back of your computer tower.
- Take the HDMI cable and securely connect one end to the HDMI port on your graphics card.
- Connect the other end of the HDMI cable to the HDMI input on your monitor or display.
- Once the cable is connected, power on your computer and the display device.
- Configure the display settings through your operating system.
Now you are ready to enjoy the benefits of utilizing your GPU HDMI connection. Whether you are gaming, watching high-definition videos, or working on graphics-intensive tasks, the enhanced graphics performance provided by the dedicated graphics card will elevate your visual experience.
Keep in mind that different graphics cards may have additional settings or software specific to their brand or model. Consult the manufacturer’s instructions or online resources for any specific recommendations related to your dedicated graphics card.
Comparison between Motherboard HDMI and GPU HDMI
| Motherboard HDMI | GPU HDMI |
|---|---|
| Utilizes onboard graphics processing unit (GPU) | Utilizes dedicated graphics card for enhanced graphics performance |
| May have limitations in graphics capabilities | Offers advanced graphics capabilities |
| Typically supports basic display needs | Optimal for gaming, multimedia production, and graphics-intensive tasks |
Remember to choose a dedicated graphics card that matches your specific needs. Consider factors such as budget, performance requirements, and compatibility with your computer system. With the right equipment and proper setup, you can unlock the full potential of GPU HDMI and immerse yourself in stunning visuals and smooth graphics performance.
Switching between Motherboard HDMI and GPU HDMI
In certain situations, you may find the need to switch between the motherboard HDMI and GPU HDMI options. This could be due to specific tasks that require different graphics capabilities or personal preferences. Here, we discuss the scenarios that may require switching between the two options and provide clear instructions on how to make the transition in both directions.
When using the motherboard HDMI, the graphics processing is handled by the onboard GPU. This option is suitable for tasks that do not require advanced graphics capabilities or for users who rely on the integrated graphics provided by the motherboard.
Alternatively, using the GPU HDMI involves utilizing a dedicated graphics card, which offers more advanced graphics performance. This option is ideal for tasks such as gaming, video editing, and other graphics-intensive applications.
To switch from using the motherboard HDMI to the GPU HDMI, follow these steps:
- Power off your computer.
- Locate the HDMI port on the back panel of your computer tower. This port is connected to the dedicated graphics card.
- Disconnect the HDMI cable from the motherboard HDMI port.
- Connect the HDMI cable to the GPU HDMI port.
- Power on your computer and monitor or display.
Once your computer restarts, it should automatically detect the connected display via the GPU HDMI port. You may need to adjust the display settings in your operating system to optimize for the new connection.
To switch from using the GPU HDMI back to the motherboard HDMI, follow these steps:
- Power off your computer.
- Locate the HDMI port on the back panel of your computer tower. This port is connected to the motherboard.
- Disconnect the HDMI cable from the GPU HDMI port.
- Connect the HDMI cable to the motherboard HDMI port.
- Power on your computer and monitor or display.
After your computer restarts, it should automatically detect the connected display via the motherboard HDMI port. Again, you may need to adjust the display settings to optimize the connection.
By understanding the process of switching between motherboard HDMI and GPU HDMI, you can easily adapt your computer setup to meet different requirements and enjoy the flexibility offered by these connectivity options.
Troubleshooting HDMI Issues
HDMI issues can be frustrating and disrupt your multimedia experience. From a non-working HDMI port to undetected connections, troubleshooting common problems is essential for a seamless video output.
Checking for Integrated Graphics
In some cases, the HDMI issues may arise due to the incorrect use of integrated graphics. To resolve this problem:
- Access your computer’s BIOS settings.
- Locate the option for integrated graphics and ensure it is enabled.
- Save the changes and restart your computer.
Updating Graphics Drivers
Outdated or incompatible graphics drivers can cause HDMI-related problems. Follow these steps to update your graphics drivers:
- Open your device’s manufacturer website.
- Locate the support or downloads section.
- Find the latest graphics driver for your specific model.
- Download and install the driver, following the on-screen instructions.
- Restart your computer to apply the changes.
Resolving Hardware Compatibility Issues
Sometimes, HDMI issues can stem from compatibility problems with your hardware. To troubleshoot this:
- Check if your HDMI cable is compatible with the HDMI version supported by your devices.
- Try using a different HDMI cable, as the current one may be damaged or faulty.
- If you’re using adapters or converters, ensure they are compatible and functioning properly.
If the above troubleshooting steps don’t resolve the HDMI issues, it’s recommended to seek professional assistance or consult the manufacturer’s support for further guidance.
Advantages of Using Motherboard HDMI
When it comes to connecting display devices to your computer, utilizing the motherboard HDMI port offers a range of advantages that enhance your multimedia experience. Let’s explore the benefits of using motherboard HDMI:
- Multiple Display Connectivity: One of the primary advantages of using motherboard HDMI is the ability to connect multiple display devices simultaneously. This allows you to expand your workstation and multitask effectively. Whether you’re working on a complex project, streaming content, or gaming, the extended screen real estate enables you to engage with multiple applications or media simultaneously, boosting your productivity.
- Increased Work Efficiency and Productivity: With the flexibility to connect multiple display devices, motherboard HDMI helps you optimize productivity by creating a seamless multitasking environment. You can have different applications, documents, or webpages open on separate screens, enabling effortless switching between tasks and reducing the need for constant window resizing or minimizing/maximizing. This streamlines your workflow and helps you stay focused, ultimately saving time and improving work efficiency.
- Support for High-Resolution Textures in Games: Gamers can benefit greatly from using motherboard HDMI, especially when it comes to high-resolution gaming. The HDMI interface supports higher bandwidth, allowing for the transmission of high-quality audio and video signals. This means you can experience games with stunning graphics, crisp textures, and immersive audio, taking your gaming experience to the next level.
In summary, the advantages of using motherboard HDMI encompass multiple display connectivity, improved work efficiency, and enhanced gaming experiences. By harnessing the power of motherboard HDMI, you can enjoy seamless multitasking, boost productivity, and immerse yourself in visually stunning games. It’s time to unlock the full potential of your computer with motherboard HDMI.
Drawbacks of Using Motherboard HDMI
While the convenience and compatibility of the motherboard HDMI are undeniable, there are certain limitations that need to be considered. These drawbacks include:
- Limited Graphics Performance: The onboard graphics processing unit (GPU) of the motherboard may not be able to handle graphics-intensive tasks effectively, such as video editing or playing high-end games. The lack of dedicated graphics power can result in lower frame rates, reduced visual quality, and overall subpar performance.
- Multi-Monitor Gaming Limitations: Another drawback of using the motherboard HDMI is the inability to play games across multiple monitors. Integrated graphics solutions often lack the necessary horsepower to drive multiple displays smoothly, resulting in diminished gaming experiences for enthusiasts who prefer an expansive view.
- Need for Dedicated Graphics Card: As the motherboard HDMI relies on the integrated graphics, it may not meet the requirements of users who demand superior graphics performance. Applications that heavily rely on graphics processing may not run optimally without a dedicated graphics card. Graphic designers, video editors, and gamers seeking enhanced visuals and fluid gameplay should consider investing in a dedicated GPU.
Although the motherboard HDMI offers convenience for everyday computing tasks and light multimedia usage, it may not be suitable for those with higher graphics demands. For users seeking advanced graphics capabilities, alternative solutions like a dedicated graphics card can provide the necessary power and performance for better visual experiences.
| Limitations of Motherboard HDMI | Solutions |
|---|---|
| Limited graphics performance | Invest in a dedicated graphics card for enhanced graphics processing. |
| Inability to play games across multiple monitors | Consider adding a dedicated graphics card to support multi-monitor gaming. |
| Not suitable for graphics-intensive tasks | Upgrade to a dedicated graphics card for improved performance. |
Influence on Performance of Dedicated and Integrated Graphics
The performance of dedicated and integrated graphics can significantly impact the overall performance of your system. Understanding the differences between these two options and their respective capabilities is essential for optimizing your computer’s graphical capabilities.
When it comes to resource-intensive applications, such as gaming or graphic design software, a dedicated graphics processing unit (GPU) is typically more powerful and capable than an integrated GPU. Dedicated GPUs have their own dedicated memory, faster processing speeds, and advanced rendering capabilities, making them better suited for handling complex graphics and running resource-intensive applications smoothly.
In contrast, integrated graphics rely on the computer’s central processing unit (CPU) and system memory. While they are more affordable and power-efficient, they may struggle to deliver the same level of performance as dedicated GPUs when it comes to running demanding applications.
The differences in power, memory usage, and image data extraction between dedicated and integrated graphics can be visually represented as follows:
| Graphics Type | Power | Memory Usage | Image Data Extraction |
|---|---|---|---|
| Dedicated GPU | High | Dedicated memory | Efficient |
| Integrated GPU | Lower | Shared with system memory | Limited |
Optimizing Performance for Your Needs
To optimize performance based on your specific needs, consider the following:
- For resource-intensive applications or tasks that require high-quality visuals, consider using a dedicated GPU. It will provide better performance and ensure smooth operation.
- When using integrated graphics, avoid running multiple resource-intensive applications simultaneously, as it can strain system resources and potentially lead to performance issues or lag.
- If you frequently work with resource-intensive applications, consider upgrading to a dedicated GPU to enhance your system’s graphical capabilities and overall performance.
By understanding the impact of dedicated and integrated graphics on performance and making informed choices based on your specific needs, you can optimize your system’s graphical capabilities and ensure a smooth experience when using resource-intensive applications.
Conclusion
Enabling the HDMI port on your motherboard is a simple yet impactful way to expand the connectivity options of your computer. By following the step-by-step guides and troubleshooting tips provided in this article, you can successfully enable and utilize the HDMI port for seamless video output. Whether you choose to use the motherboard HDMI or the GPU HDMI, it is important to understand the differences between the two options.
The motherboard HDMI offers advantages such as the ability to connect multiple displays and increased work efficiency through multitasking. However, it also has limitations, such as the inability to play multi-monitor games and limited graphics performance for graphics-intensive tasks. If you require advanced graphics capabilities, a dedicated graphics card with GPU HDMI may be a better option for you.
In conclusion, the HDMI port on your motherboard provides versatile connectivity solutions for your computer. By considering the advantages and limitations of both options, you can make an informed decision on which HDMI port to use. Whether you opt for the convenience of the motherboard HDMI or the enhanced graphics capabilities of the GPU HDMI, enabling and utilizing the HDMI port on your motherboard can enhance your multimedia experience.

