Are you a passionate gamer looking to elevate your gaming experience? One way to add a personal touch to your gaming setup is by creating your own custom mouse pad. Not only is it a budget-friendly option, but it also allows you to showcase your creativity and individuality.
Imagine this: you’re in a heated online battle, adrenaline pumping, and your mouse glides effortlessly across a smooth and tailored surface. Your custom-made mouse pad not only complements your gaming style, but its ergonomic design enhances your precision and control. As your opponent tries to keep up, you can’t help but smile, knowing that your DIY creation is giving you the competitive edge.
With just a few simple steps and materials, you can transform a plain mouse pad into a gaming accessory that reflects your style and preferences. Whether you’re a seasoned crafter or new to the DIY scene, this tutorial will guide you through the process of making a personalized mouse pad that will take your gaming to the next level.
Key Takeaways:
- Create a personalized gaming experience by making your own mouse pad
- Customization allows you to reflect your style and preferences
- A DIY mouse pad can enhance precision and control during gaming
- With a few simple steps and materials, you can make your own custom mouse pad
- Express your creativity and individuality through your DIY gaming accessory
Why Make Your Own Mouse Pad?
Making your own mouse pad offers several advantages. Firstly, it allows you to customize the design and aesthetics to match your gaming setup. You can choose colors, patterns, and themes that reflect your personal style. Secondly, crafting your own mouse pad gives you a sense of accomplishment and satisfaction. It’s a fun and creative project that allows you to express your creativity and individuality. Lastly, homemade gaming accessories, such as mouse pads, can be more cost-effective than purchasing pre-made products. By creating your own mouse pad, you can save money and have a unique item that can’t be found in stores.
Materials Needed

To make a DIY gaming mouse pad, you will need the following materials:
- A pre-cut cork circle or cardboard (for the base)
- Scrapbook paper or fabric (for the top layer)
- Mod Podge Gloss (for adhesion)
- Ribbon (optional)
- Acrylic paint (optional)
- Foam brush
- Scissors
- Pencil
The size of the mouse pad will depend on your personal preference, but it’s recommended to have a circular pad with a diameter of at least 7 inches to ensure optimal use for gaming. Additionally, using materials with some thickness ensures ease of application and prevents the base material from showing through the design.
For a visual representation, refer to the table below:
| Materials | Quantity |
|---|---|
| Pre-cut cork circle or cardboard | 1 |
| Scrapbook paper or fabric | 1 |
| Mod Podge Gloss | 1 |
| Ribbon (optional) | 1 |
| Acrylic paint (optional) | 1 |
| Foam brush | 1 |
| Scissors | 1 |
| Pencil | 1 |
Step-by-Step Tutorial
Follow these step-by-step instructions to make your own gaming mouse pad:
- Trace the cork circle shape on the back of your scrapbook paper or fabric and cut it out.
- Apply a layer of Mod Podge Gloss to the top part of the cork circle and the back of the scrapbook paper/fabric.
- Place the paper/fabric on the cork, smoothing it down thoroughly and pressing the sides. Let it dry.
- Paint the ribbon (if desired) on both sides and let it dry.
- Attach the ribbon to the edge of the mouse pad using a glue gun or Mod Podge.
- Seal the entire mouse pad, including the edges, with another layer of Mod Podge to protect it from wear.
- Let the mouse pad dry completely before using.
Creating your own handmade gaming accessories, such as a mouse pad, allows you to express your creativity and personalize your gaming experience. The step-by-step tutorial above provides you with the necessary guidance to design a custom mouse pad that suits your style and preferences. By following these instructions, you can enhance your gaming setup with a unique and functional accessory.
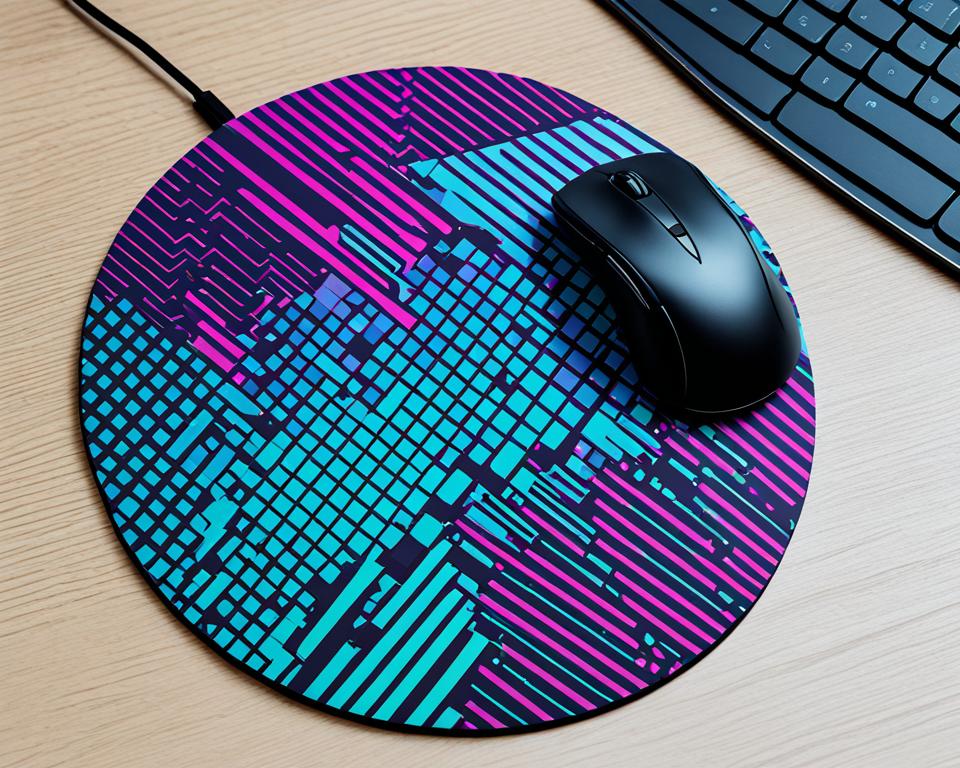
Example Mouse Pad Design:
Here’s an example of a creatively designed mouse pad:
| Mouse Pad Design Ideas |
|---|
Alternative DIY Mouse Pad Options

If you prefer an alternative DIY mouse pad option, there are a few other techniques you can try.
Cardboard or Foam Core Mouse Pad
Create a mouse pad using cardboard or foam core as the base for a sturdy and budget-friendly option. Cut the material to your desired size and shape, ensuring it is large enough to accommodate your gaming mouse. Then, decorate the surface with a decorative top layer of your choice, such as wallpaper, wrapping paper, or fabric. This allows for customization and gives you the flexibility to match your gaming setup or personal style.
Temporary Mouse Pad
In situations where you need a makeshift mouse pad, you can easily create a temporary one using a small book or a plastic envelope filled with a weight. Simply place the book or envelope on your desk, and the weight will provide stability while using your gaming mouse. Though this option is not as customizable as the previous one, it can be convenient for temporary setups or when you’re on the go.
These alternative methods offer flexibility in terms of size, shape, and design, allowing you to tailor your DIY mouse pad to your specific needs and preferences.
| DIY Mouse Pad Option | Description |
|---|---|
| Cardboard or Foam Core Mouse Pad | Create a mouse pad using cardboard or foam core as the base and decorate it with a decorative top layer of your choice. |
| Temporary Mouse Pad | Create a temporary mouse pad using a small book or plastic envelope filled with a weight for stability. |
Tips and Tricks

When making your own mouse pad, consider these tips and tricks for optimal results:
- Leave a little extra fabric or paper hanging over the sides of the pad to fold over the edges for a clean look.
- If the desired ribbon color is not available, you can paint it with acrylic paint for a custom touch.
- Experiment with different materials, patterns, and colors to match your gaming setup or personal style.
- Use a foam brush for smooth and even application of Mod Podge.
- Let each layer dry completely before moving on to the next step.
- Consider adding additional layers of Mod Podge to the top of the mouse pad for added durability and protection.
Follow these tips and tricks to ensure your DIY mouse pad turns out perfect. By paying attention to details such as folding over the edges, customizing ribbon colors, and experimenting with different materials, patterns, and colors, you can create a handmade gaming accessory that not only enhances your gaming experience but also reflects your personal style. Additionally, using a foam brush for application and allowing each layer to dry completely will ensure a smooth and durable finish. Adding extra layers of Mod Podge will provide extra protection for your mouse pad, making it last longer.
Testimonial:
“I followed these tips and tricks to make my own ergonomic mouse pad, and I couldn’t be happier with the result. The hanging fabric over the edges gives it a polished and professional look, while the custom-painted ribbon adds a unique touch. The foam brush made for easy application of Mod Podge, and I’m confident that the extra layers will keep my mouse pad protected for a long time. Thank you for these helpful guidelines!”
— Jessica, avid gamer and DIY enthusiast
| Tip/Trick | Benefits |
|---|---|
| Leave extra fabric or paper hanging over the sides | Creates a clean and polished look |
| Paint ribbon with acrylic paint | Allows for customization and personalization |
| Experiment with materials, patterns, and colors | Matches gaming setup and personal style |
| Use foam brush for application | Achieves a smooth and even finish |
| Let each layer dry completely | Ensures a durable and long-lasting mouse pad |
| Add extra layers of Mod Podge | Provides added durability and protection |
Benefits of a DIY Mouse Pad
Crafting your own mouse pad offers several benefits. Firstly, you can customize the design to fit your gaming setup or personal preferences, creating a unique and personalized item. Secondly, a DIY mouse pad allows you to experiment with different materials and textures, ensuring optimal comfort and functionality. Thirdly, making your own gaming accessories can be a rewarding and enjoyable hobby, allowing you to express your creativity while enhancing your gaming experience. Additionally, DIY mouse pads can be cost-effective compared to purchasing pre-made options.
Inspiration for Custom Mouse Pad Designs

When it comes to designing a custom mouse pad, the possibilities are truly endless. You have the freedom to draw inspiration from various sources, such as your favorite video games, movies, art, patterns, or colors. Let your imagination run wild as you think about the elements that reflect your unique gaming style or interests.
You can also experiment with different techniques to create one-of-a-kind designs. Consider using stenciling to add intricate patterns or shapes to your mouse pad. Decoupage is another popular method that involves layering cutouts from magazines or printed images onto the pad’s surface. If you’re feeling particularly creative, try using vinyl cutouts to add a touch of innovation to your design.
Don’t be afraid to think outside the box and infuse your mouse pad design with your own personal flair. By incorporating elements that truly reflect who you are as a gamer, you can create a mouse pad that not only enhances your gaming experience but also serves as a unique expression of your individuality.
Popular Mouse Pad Design Ideas
| Design Theme | Description |
|---|---|
| Sci-Fi | Inspired by futuristic technology and space exploration, sci-fi themed mouse pads often feature sleek designs, metallic accents, and cosmic imagery. |
| Minimalist | Minimalist mouse pads focus on simplicity and clean lines. They often feature monochromatic color palettes, geometric patterns, and understated graphics. |
| Fantasy | For gamers who love fantasy worlds, these mouse pads feature mythical creatures, enchanted landscapes, and intricate illustrations inspired by medieval tales. |
| Retro | Retro-themed mouse pads harken back to the nostalgia of the ’80s and ’90s. They often incorporate pixel art, vibrant colors, and iconic symbols from classic video games. |
| Abstract | Abstract mouse pads are all about artistic expression and creative interpretation. They showcase bold colors, unique shapes, and thought-provoking designs. |
Final Thoughts
Making a DIY mouse pad for gaming is an exciting and fulfilling project that allows you to personalize your gaming experience. By following the step-by-step tutorial and incorporating your own unique design ideas, you can create a mouse pad that reflects your style and enhances your gaming setup.
When making your own mouse pad, it’s important to choose materials that provide comfort, functionality, and durability. Consider using cork or cardboard for the base and scrapbook paper or fabric for the top layer. The size of the mouse pad should be optimized for gaming, preferably with a diameter of at least 7 inches to ensure a sufficient surface area.
Get creative with your design! Explore different patterns, colors, and themes that match your gaming style and preferences. Don’t be afraid to experiment with stencils, decals, or custom artwork to make your mouse pad truly unique.
Remember, a DIY mouse pad not only adds a personal touch to your gaming setup but also showcases your creativity and craftsmanship. It’s a handmade gaming accessory that you can proudly display during your gaming sessions.
So, go ahead and embark on this DIY adventure. Create a custom mouse pad that complements your gaming desk setup and elevates your gaming experience to a whole new level. Let your imagination soar and enjoy the process of making a personalized gaming accessory that is truly your own.
Now, it’s time to put your gaming prowess to the test with a mouse pad designed exclusively for you. Have fun and game on!
Showcasing Your DIY Mouse Pad
Once you have completed your DIY mouse pad, it’s time to showcase it in your gaming setup. Place it on your desk alongside your other gaming peripherals, such as your keyboard, headset, and monitor. Take pride in the fact that you have created a customized and personalized accessory that not only enhances your gaming experience but also reflects your creativity and individuality. Share your creation with other gamers and inspire them to embark on their own DIY gaming accessory projects.
When showcasing your DIY mouse pad, consider its placement within your gaming desk setup. Position it in a prominent spot where it complements the overall aesthetic and functionality. Displaying it alongside other handmade gaming accessories can create a cohesive and visually appealing look.
Sharing Inspiration and Ideas
Sharing your DIY mouse pad creation with the gaming community can generate enthusiasm and encourage others to explore their creative side. Take pictures of your gaming desk setup, highlighting your personalized mouse pad, and post them on social media platforms or gaming forums using relevant hashtags. Describe your DIY process and provide step-by-step instructions for fellow gamers to follow.
“I’m thrilled with my custom mouse pad creation. It not only adds a personal touch to my gaming setup but also enhances my gameplay experience. Seeing the positive response from the gaming community has motivated me to continue exploring new handmade gaming accessories.”
Engaging with other DIY enthusiasts and gamers can also inspire you to try new ideas and techniques. Visit online communities, participate in discussions, and share your experiences. The exchange of ideas can lead to even more innovative gaming desk setup ideas and creative projects.
Enhancing Your Gaming Experience
By showcasing your DIY mouse pad in your gaming setup, you create a space that truly reflects your personality and gaming style. Not only does it provide functionality and comfort, but it also serves as a reminder of your creative capabilities. Each time you sit down to play, your customized mouse pad will enhance your gaming experience and make it even more enjoyable.
Conclusion
Making a mouse pad for gaming doesn’t have to be expensive or complicated. With a few simple materials and a dash of creativity, you can create a DIY gaming mouse pad that is tailored to your preferences and style. Whether you choose to use cork, cardboard, or alternative materials for the base, and scrapbook paper, fabric, or other decorative materials for the top layer, the process is straightforward and allows for customization. Get ready to elevate your gaming experience with a homemade mouse pad that reflects your individuality and enhances your gaming setup.
By following this custom gaming mouse pad tutorial, you can express your creativity and make a unique accessory that complements your gaming space. Not only will crafting your own mouse pad save you money, but it will also provide a sense of pride and satisfaction. Say goodbye to generic mouse pads and personalize your gaming setup with a DIY creation.
So what are you waiting for? Grab your materials, unleash your creativity, and embark on this DIY project. Design a mouse pad that matches your style, enhances your gaming experience, and sets you apart from the crowd. Enjoy the process of making something with your own hands, and let your imagination run wild. Level up your gaming setup with a custom gaming mouse pad that truly reflects who you are.


