Are you ready to take your PC gaming experience to the next level? Installing a new graphics card (GPU) is a great way to enhance the performance and visuals of your games. Whether you’re a seasoned gamer or just starting out, connecting your graphics card to the motherboard can seem a bit daunting at first. But fear not, we’re here to guide you through the installation process step by step.
But before we dive into the nitty-gritty, let’s set the stage with a relatable story. Meet Alex, an avid gamer who recently decided to upgrade his PC to play the latest games with stunning graphics. Alex had done his research and selected a powerful graphics card that would meet his gaming needs. However, when it came time to install it, he was faced with the challenge of connecting the graphics card to the motherboard.
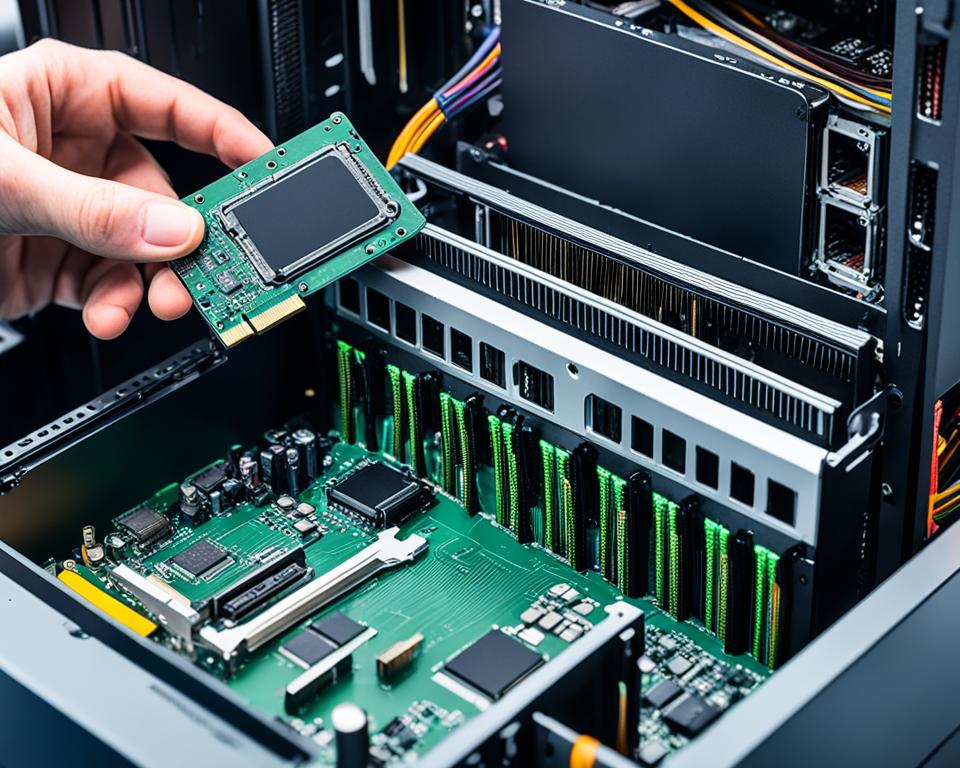
As a DIY enthusiast, Alex was determined to tackle the installation himself. Armed with his trusty screwdriver and a cup of coffee, he meticulously followed the installation guide that came with his graphics card. He carefully removed the PCIe expansion slot brackets from the back of his PC case, revealing the motherboard’s PCIe x16 slot. With a bit of nervous excitement, Alex aligned the GPU’s PCIe connector with the slot and firmly pushed it into place.
Once the graphics card was securely installed, Alex proceeded to connect the necessary power cables from his power supply unit (PSU) to the graphics card. He double-checked his PSU’s wattage to ensure it could handle the power draw of the new GPU.
Now that Alex had successfully connected his graphics card to the motherboard, he was ready to embark on a gaming journey like no other. With the enhanced visuals and improved performance, Alex could immerse himself in his favorite games and experience them in a whole new way.
Key Takeaways:
- Installing a graphics card can greatly enhance your PC gaming experience.
- Before you begin, check the dimensions of the GPU and verify your PSU can handle the power draw.
- Follow the installation guide that comes with your graphics card.
- Ensure the GPU is securely connected to the motherboard’s PCIe x16 slot.
- Connect the necessary power cables from the PSU to the graphics card.
Checking Graphics Card Dimensions and Power Supply Requirements

In order to successfully install a graphics card in your PC, it is crucial to check its dimensions to ensure compatibility with your PC case. Additionally, you need to verify if your power supply unit (PSU) meets the power requirements of the graphics card.
Graphics card dimensions can vary significantly, and it’s important to ensure that the length and height of the card are suitable for your PC case. Most PC cases specify the maximum dimensions of the graphics card they can accommodate. Consulting the specifications of your PC case will allow you to determine if the graphics card you plan to install will fit properly.
The power supply unit plays a crucial role in providing sufficient power to your graphics card. Graphics cards often demand the most power in a system, especially high-performance models. It is essential to ensure that your PSU can handle the power draw of the graphics card you plan to install. Refer to the specifications provided by the graphics card manufacturer to determine the power requirements of the specific model you intend to use.
If your current power supply unit is not powerful enough to support the graphics card, it may be necessary to upgrade to a higher wattage PSU. Insufficient power supply can lead to system instability and performance issues.
Graphcis Card Dimensions Compatibility Examples
| Graphics Card Model | Length (mm) | Height (mm) |
|---|---|---|
| NVIDIA GeForce RTX 3080 | 285 | 112 |
| AMD Radeon RX 6800 XT | 267 | 121 |
| MSI GeForce GTX 1660 | 204 | 128 |
Check the dimensions of your chosen graphics card against the specifications of your PC case to ensure a proper fit. It is recommended to leave some extra space for proper ventilation and cable management.
Note: Keep in mind that these dimensions are just examples, and it is essential to consult the specific dimensions provided by the manufacturer of your graphics card.
Steps to Install the Graphics Card

Once you have checked the dimensions of your graphics card and ensured that your power supply unit (PSU) can handle its power draw, it’s time to install the graphics card into your PC. Follow these steps to successfully install your graphics card:
- Step 1: Remove the PCIe expansion slot brackets from the back of the PC case. These brackets may be secured with screws or clips, so use a screwdriver or release mechanism to detach them.
- Step 2: Locate the PCIe x16 slot on your motherboard. It is typically the longest slot and is designed to accommodate the graphics card. Before inserting the graphics card, ensure that the latch on the slot is pushed down.
- Step 3: Align the PCIe connector on the graphics card with the PCIe x16 slot on the motherboard. The connector and slot have a specific shape that allows for correct alignment. Gently insert the graphics card into the slot, applying even pressure until it is firmly in place. Be careful not to force it, as this may cause damage to the components.
- Step 4: Once the graphics card is securely inserted, use a screwdriver to fasten the rear bracket of the graphics card to the PC case. This helps to stabilize the graphics card and prevent any movement during usage.
- Step 5: Connect the required PSU cables to the graphics card. Depending on your graphics card model, you may need to connect one or more PCIe power cables to provide power. Refer to your graphics card’s manual to identify the specific connectors and make the necessary connections.
Congratulations! You have successfully installed your graphics card. Your PC is now ready to take advantage of its enhanced graphics capabilities.
| Step | Description |
|---|---|
| Step 1 | Remove the PCIe expansion slot brackets from the back of the PC case. |
| Step 2 | Locate the PCIe x16 slot on the motherboard and ensure the latch is pushed down. |
| Step 3 | Align the GPU’s PCIe connector with the PCIe slot and push it down until it is firmly in place. |
| Step 4 | Use a screwdriver to secure the rear bracket of the GPU to the case. |
| Step 5 | Connect the required PSU cables to the graphics card to provide power. |
Downloading GPU Drivers

After successfully installing your new graphics card, the next important step is to download and install the latest GPU drivers. These drivers are essential for ensuring optimal performance and compatibility with your system. Additionally, they often include important updates and features that enhance your gaming experience.
Here is a step-by-step guide on how to download and install GPU drivers:
- Visit the manufacturer’s website. For example, if you have an NVIDIA graphics card, go to the NVIDIA website.
- Locate the support or drivers section on the website.
- Find the appropriate driver for your specific GPU model and operating system.
- Click on the download link to start the downloading process.
- Once the driver file is downloaded, locate it on your computer and run the installer.
- Follow the on-screen instructions to complete the installation process.
- After the installation is complete, restart your computer to apply the changes.
It’s important to keep your GPU drivers up to date to ensure the best performance and compatibility with the latest games and applications. Regularly check for driver updates on the manufacturer’s website and install them as soon as they become available.
Choosing the Right Graphics Card

When it comes to choosing a graphics card, there are several key considerations to keep in mind. To ensure you make the right decision for your gaming or professional needs, it’s important to think about your budget, desired performance level, noise and heat tolerance, and power consumption requirements.
Both AMD and Nvidia offer a wide range of graphics cards to suit various budgets. Conduct thorough research and compare different models to find the best fit for your specific requirements. By examining the features, specifications, and user reviews, you can make an informed decision and select a graphics card that ticks all the right boxes.
“The right graphics card can make all the difference in your gaming experience. Take the time to choose one that not only fits your budget but also delivers the performance and reliability you need.”
PCWorld’s graphics card buying guide can serve as a valuable resource throughout your decision-making process. It provides comprehensive information, tips, and recommendations for selecting the perfect graphics card for your gaming setup or workstation.
Consider the following factors when choosing a graphics card:
- Budget: Determine how much you are willing to spend and explore options within that price range.
- Performance: Assess your requirements and select a graphics card that can handle the workload and gaming demands of your applications.
- Noise and Heat: Evaluate the cooling system of the graphics card and ensure it aligns with your preferences for noise output and heat management.
- Power Consumption: Check the power requirements of the graphics card and match them with your existing power supply unit (PSU).
By considering these factors, you can make an informed decision and choose a graphics card that offers the best combination of performance, reliability, and value for your needs.
| Brand | Model | Price Range | Performance |
|---|---|---|---|
| AMD | Radeon RX 5600 XT | $300-$350 | High |
| Nvidia | GeForce RTX 3060 Ti | $400-$500 | Very High |
| AMD | Radeon RX 5700 XT | $350-$400 | Very High |
| Nvidia | GeForce RTX 3070 | $500-$600 | Ultra High |
Verifying Hardware Compatibility
Before purchasing a new graphics card, it is crucial to ensure that your computer’s hardware is compatible. This step is essential to avoid any compatibility issues that could arise during the installation process. Here are some factors to consider:
1. Power Supply Unit Wattage
Check the wattage requirements of the graphics card and compare them to the power supply unit (PSU) in your PC. The GPU is one of the most power-hungry components in a system, so it’s crucial to ensure that your PSU can handle the power draw. If your existing PSU does not meet the minimum wattage requirements of the graphics card, it may be necessary to upgrade to a higher-wattage PSU to avoid any power-related issues.
2. Graphics Card Size
Consider the physical dimensions of the graphics card and ensure that it will fit inside your PC case without any issues. Most PC cases specify the maximum length and height a GPU can be. It’s important to verify if there is enough space for the graphics card to fit comfortably without obstructing other components or cables. Additionally, check if the GPU’s slot size matches the motherboard’s PCIe slot.
3. Available PCI-E Power Connectors
Make sure that your power supply unit has enough available PCI-E power connectors to supply power to the graphics card. Some high-performance GPUs require additional power connectors beyond the PCIe slot. Refer to the GPU’s documentation or the manufacturer’s website to determine the number and type of power connectors required. Confirm that your PSU has the necessary connectors to avoid any power delivery issues.
“Verifying hardware compatibility is crucial to ensure a hassle-free installation of your new graphics card. By checking the power supply unit wattage, graphics card size, and available PCI-E power connectors, you can avoid compatibility issues and ensure a smooth upgrade process.”
By verifying these hardware compatibility factors, you can ensure a seamless installation process for your new graphics card. Taking these steps beforehand will help you avoid any unexpected issues and ensure that your new GPU is compatible with your existing system setup.
Removing and Replacing Existing Graphics Card
If you already have a graphics card installed in your PC, you will need to remove it before installing the new one. Follow these steps to safely remove and replace the existing graphics card:
- Start by disconnecting all cables from the existing graphics card. This includes any power cables and display cables.
- Next, locate and remove any screws securing the graphics card to the chassis of your PC. Set the screws aside in a safe place.
- Once the screws are removed, you’ll need to unlock the latch at the end of the PCIe slot. This latch holds the graphics card in place.
- Carefully lift the old graphics card out of the slot, making sure not to touch any of the components on the card itself.
Now that you’ve successfully removed the old graphics card, you’re ready to install the new one. Refer to Section 3 for detailed instructions on installing the new graphics card.
Troubleshooting Display Issues
If you experience display issues or no display after installing the graphics card, it can be frustrating. However, there are steps you can take to troubleshoot the problem and get your display back up and running.
1. Disconnect and Reinstall
Start by disconnecting the system power cord and removing the graphics card from the motherboard. Check the PCIe power connectors and ensure they are securely connected to the graphics card. Then, reinstall the graphics card and reconnect the power cord.
2. Verify Connections
Make sure all connections are properly secured. Check the cables connecting the graphics card to the monitor and ensure they are tightly connected. If you are using adapters or converters, double-check their compatibility and make sure they are working correctly.
3. Update Drivers
Outdated or incompatible drivers can cause display issues. Visit the manufacturer’s website and download the latest drivers for your graphics card model. Install the drivers and restart your computer to see if the display issue is resolved.
4. Check BIOS Settings
In some cases, incorrect BIOS settings can lead to display problems. Access your computer’s BIOS menu by pressing the designated key during startup (typically DEL or F2). Ensure that the primary display output is set to the graphics card instead of the onboard graphics, if applicable.
“Display issues after installing a graphics card can be frustrating, but taking the necessary troubleshooting steps can help resolve the problem and get your display back on track.”
5. Seek Assistance
If the troubleshooting steps mentioned above do not resolve the issue, it may be necessary to seek assistance from technical support. Contact the graphics card manufacturer or consult their online support resources for further guidance.
Remember, troubleshooting display issues may require a combination of steps and patience. By following these troubleshooting methods, you can increase the chances of resolving the problem and enjoying a smooth display with your new graphics card.
Ensuring Stability with Heavier Graphics Cards
Installing a heavier graphics card requires additional precautions to ensure stability and prevent damage during transportation. To protect the graphics card during handling, it is recommended to individually package and handle it with caution. This will minimize the risk of any physical stress or accidental drops that may jeopardize the card’s proper functioning.
In addition to careful handling, another way to enhance stability is by installing a graphics card bracket inside the chassis. A graphics card bracket provides additional support to hold the card securely in place, reducing the risk of sagging or movement due to its weight. By preventing any unwanted shifts or vibrations, the bracket helps maintain optimal performance and longevity of the graphics card.
Manufacturers often provide information on their official websites regarding graphics card brackets and other stability-enhancing solutions. It is recommended to refer to the manufacturer’s website for specific recommendations and guidelines related to your graphics card model.
| Benefits of a Graphics Card Bracket |
|---|
| 1. Enhanced stability and support for heavier graphics cards |
| 2. Prevention of sagging or movement due to weight |
| 3. Reduction of stress on motherboard and PCIe slot |
| 4. Improved airflow and cooling within the chassis |
| 5. Longer lifespan of the graphics card |
Installing Graphics Card Drivers
Once you’ve successfully installed your new graphics card, the next step is to install the appropriate drivers. Without the proper drivers, your graphics card may not function at its full potential, resulting in subpar performance and potential compatibility issues.
To begin, visit the manufacturer’s website of your graphics card and navigate to the support or drivers section. Look for the latest driver package that is compatible with your operating system. Download the driver package and save it to a location that is easily accessible.
Once the driver package is downloaded, run the installation file and follow the on-screen instructions to install the drivers. After the installation is complete, it’s important to restart your computer to ensure the changes take effect.
If you are switching between different GPU brands, it is recommended to uninstall the old graphics driver before installing the new one. This can help prevent conflicts and ensure optimal performance. Consult the manufacturer’s website or documentation for instructions on how to properly uninstall the previous driver before proceeding with the installation of the new drivers.


